Credit

If you have the option to perform a credit, choose the "Credit" tile from the Virtual Terminal menu to credit an amount to your customer’s card or account.
To process a Credit, you must fill in all the required fields from the following sections. Then, fill in additional fields as appropriate for your transaction.
All optional fields are indicated on each screen as you navigate through the wizard to process the credit to your customer.
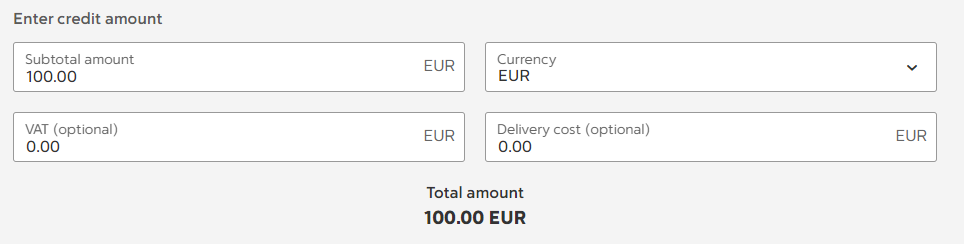
Step 1 - Enter Credit Amount(s)
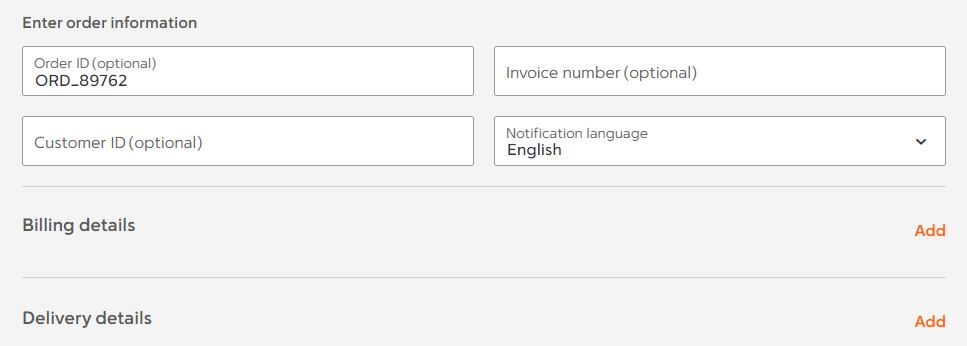
Step 2 - Enter the order information
Field description:
| Field | Presence | Description |
|---|---|---|
| Order ID | Optional | If you want to assign an order ID, enter the order number in the Order ID field. You must enter a unique ID for each order. If you are going to use this field on a regular basis, you should adopt an order ID generation procedure. If you choose not to assign an order ID, the system will automatically generate one for you. |
| Invoice number | Optional | If there is an invoice number associated with this order, enter it in this field. You may have several transactions against the same invoice, hence you may use the same invoice number when processing more than one transaction, if needed. |
| Customer ID | Optional | If the customer has a unique customer ID, enter it in this field. This enables you to search for all transactions for a specific customer in your reports. |
| Notification language | N/A | If you have the required permissions, you can select a notification language from the Notification language dropdown menu. Your customer will receive email notifications for the transaction in this selected language. |
| Billing details | Optional | Represents customer's billing information |
| Delivery details | Optional | Represents customer's shipping/delivery information |
Step 3 - Verify your order summary
After you enter the order information, billing and delivery address details, click "Next" to view the Order Summary. Before you submit the payment details, you can verify the total amount, order details, billing and delivery details on the Order summary page.
Click "Back" to change any of this information that needs to be corrected.
Click "Go to payments" to view the payment options.
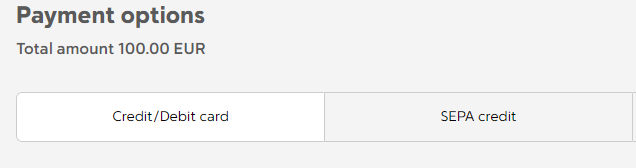
Step 4 - Process the credit transaction
You can choose one of the options presented in "Payment options" section:
Step 5 - Check confirmation screen
After you have processed the credit payment to your customer, you are directed to the confirmation screen providing you with the status of your transaction request.
Click "Perform another credit" on the screen to perform another credit transaction. Otherwise, click "Close" to return to the Virtual Terminal menu.
View the details of your transaction
Click "View transaction" to view the transaction details such as Order ID, Order balance, Transaction origin, and Order history details on the Manage Order screen.
The order history displays all transactions within the order. For more information, click Manage Order.
Cancel transaction
The transaction may be cancelled at any point during any of the steps before the credit payment is processed.
To cancel the transaction, select "Cancel transaction" at the top right hand side of your screen.
Click "Yes, Cancel" on the confirmation window to cancel the transaction.
Click "No, continue" to continue with the transaction.